Vivo recently released the vivo X21 flagship new machine has attracted much attention as a leading screen fingerprint full screen mobile phone, and joined the AI ​​artificial intelligence support, with the glass body Liu Hai full screen design, from inside and outside experience Compared with the previous generation of products, there has been a marked improvement. First, follow Xiaobian to learn about the appearance, configuration parameters, photographing and price information of vivox21, and then to learn more about the disassembly diagram of vivox21.
Appearance
Vivo X21 uses a stunning all-round screen design, with a variety of young and stylish color. It uses a 6.28-inch full screen and has a resolution of 2280*1080. The X21 is the world’s first Android phone that supports the P3 color gamut. The sRGB color gamut is as high as 99.9%. Vivo X21 aspect ratio of 19:9, with a small U-shaped slot, the screen share of 90.3%, immersively adapted to most commonly used APP, experience better.

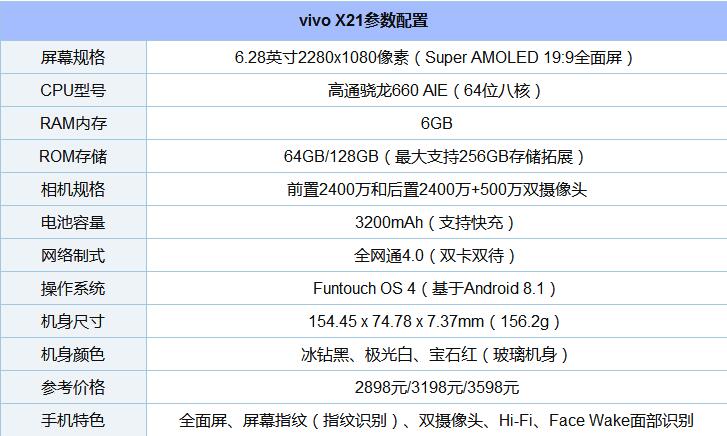
Configuration parameters
Photographs
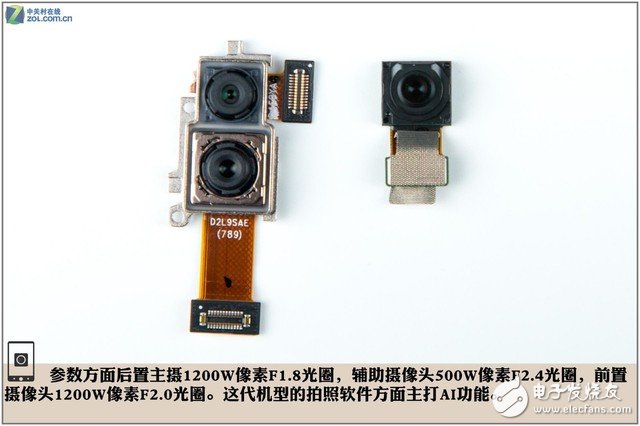
Vivo X21 equipped with 2 * 12 megapixel rear camera, 24 million light-sensitive unit, taking pictures better, using Android's only P3 color gamut colorful camera, photo color more rich and vivid. Vivo joined the ICC International Color Alliance this month, and the imaging of the future vivo flagship will be even better.
Price aspect
Vivo X21 provides two versions, the normal version is not the fingerprint under the screen, which is the traditional post-fingerprint design, providing two versions of 6+64GB, 6+128GB, the price is 2898 yuan and 3198 yuan; and with screen Fingerprint Black Tech's vivo X21 fingerprint version costs $3,598.
Vivo x21 disassembly diagram explainVivo X21 screen fingerprint disassemble method steps:
Disassemble tools: hex screwdriver, plastic fins, tweezers, crowbars, clips, etc.
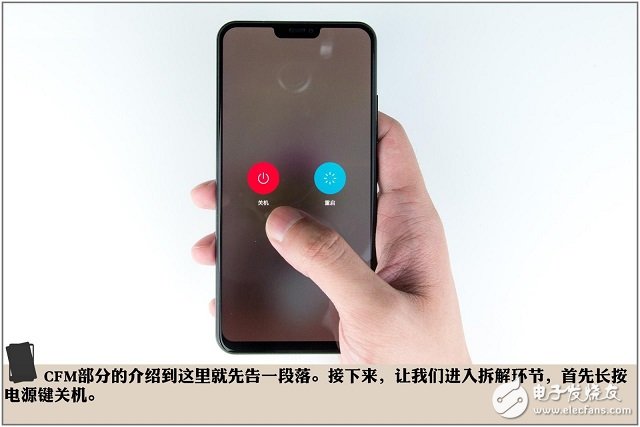
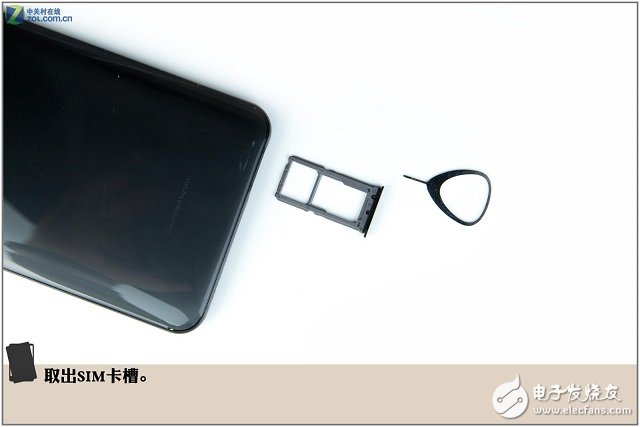
The first step: First, turn off the vivo X21 screen fingerprint version, and then use the card pin to remove the side SIM card tray, as shown in the following figure.
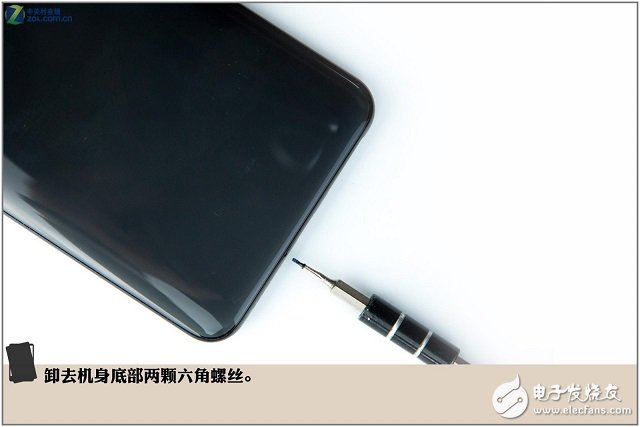
The second step: vivo X21 screen fingerprint version uses a glass body design, but there are still two hex screwdrivers fixed below the screen. Therefore, in the second step of disassembling, use a screwdriver to remove the two fixing screws at the bottom, as shown in the figure below.
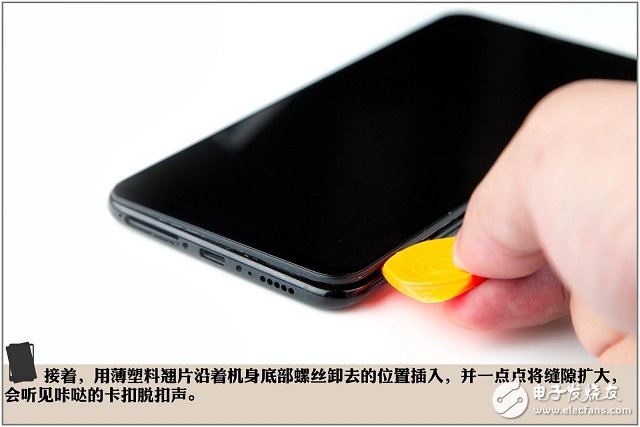
Step 3: Then use a plastic tab to insert along the gap at the bottom of the fuselage, and expand the gap a little. After that, you can hear the click release of the snap, as shown in the figure below.
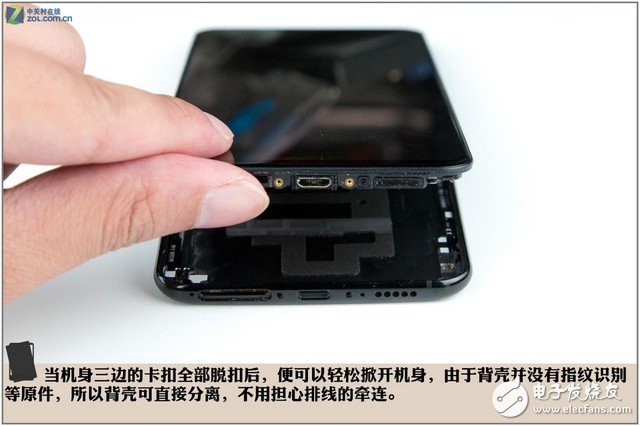
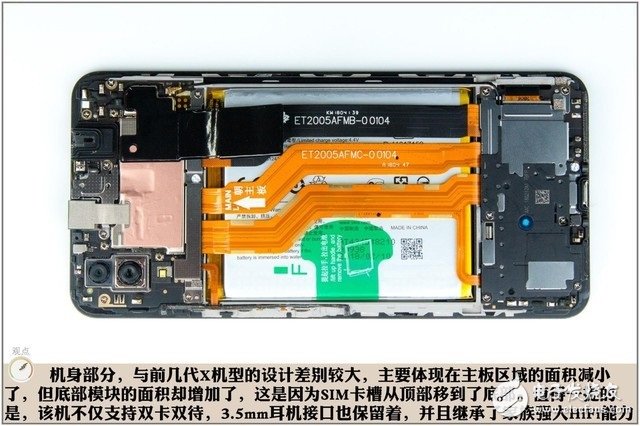
When the body clips all three times tripped, you can easily open the body, because the rear shell does not have fingerprint recognition and other components, so the back shell can be directly separated, without worrying about the implications of the cable.
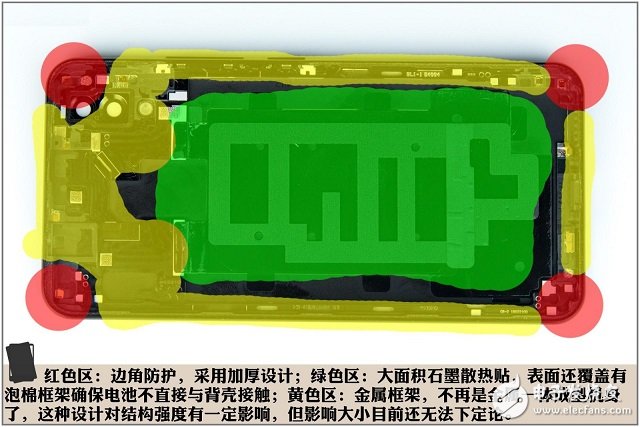
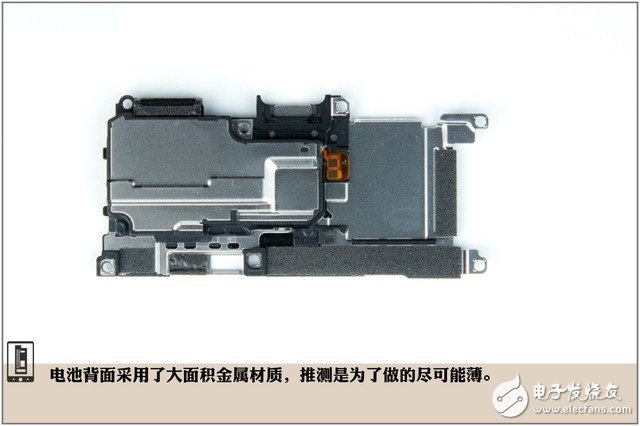
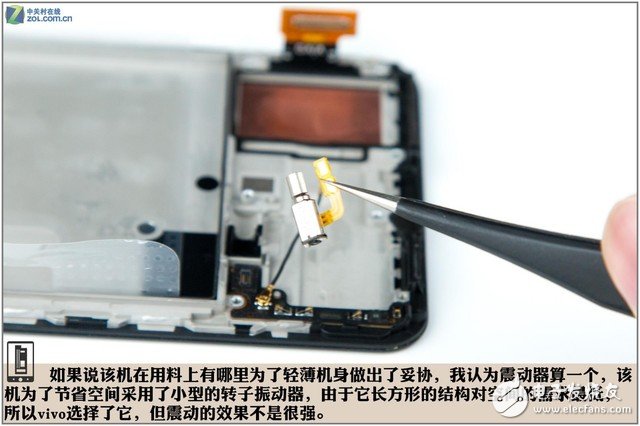
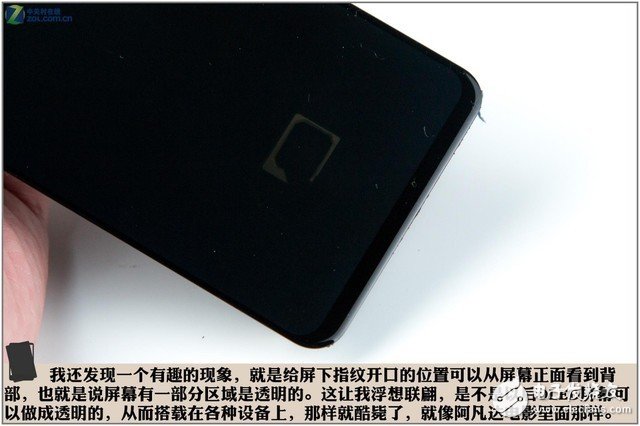
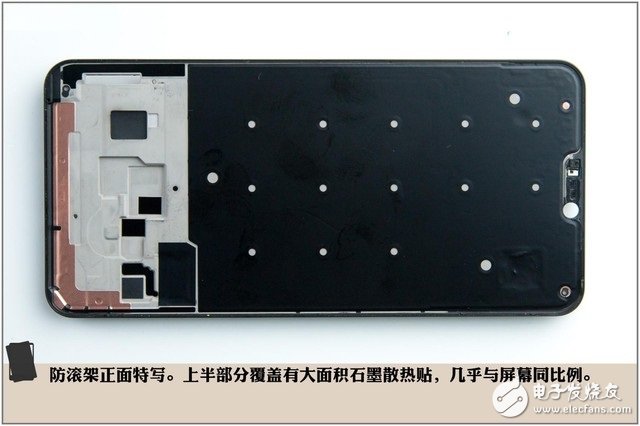
The red area in the figure below: Corner protection, thickened design; Green area: Large area graphite thermal paste, the surface is covered with a foam frame to ensure that the battery is not in direct contact with the back shell; Yellow area: metal frame, no longer a metal Lift the fuselage, this design has a certain impact on the strength of the structure, but the impact size can not be concluded.
Let's take a look at the internal structure details of the vivo X21 screen fingerprinting, and look directly at the diagram.
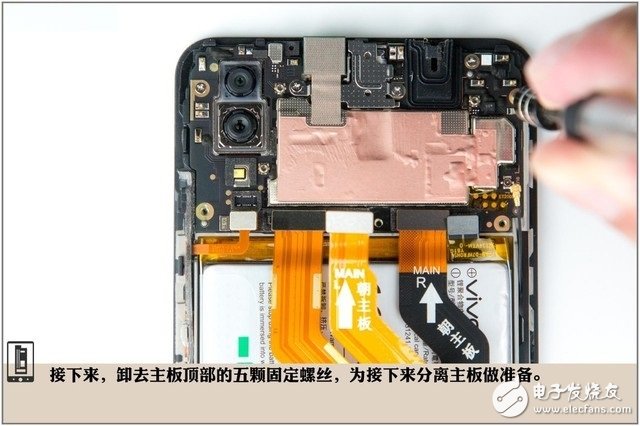
Part IV: Removing the motherboard
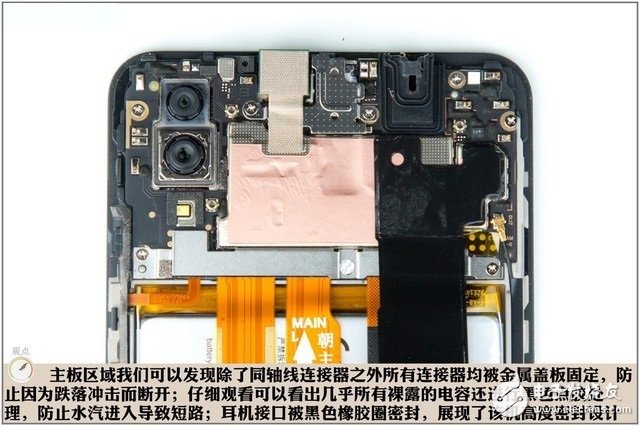
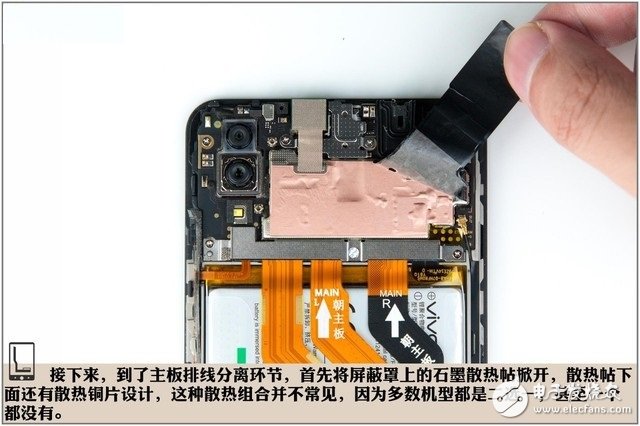
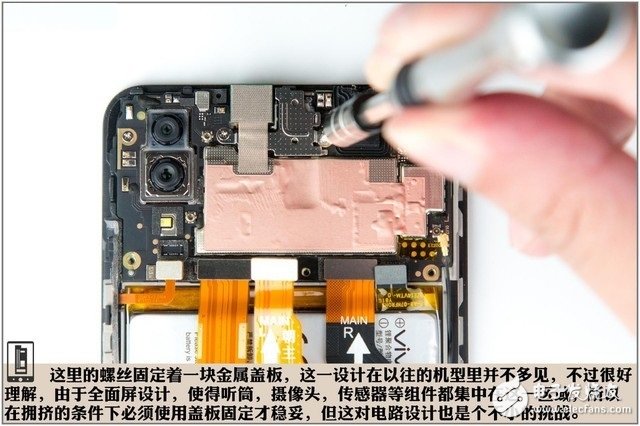
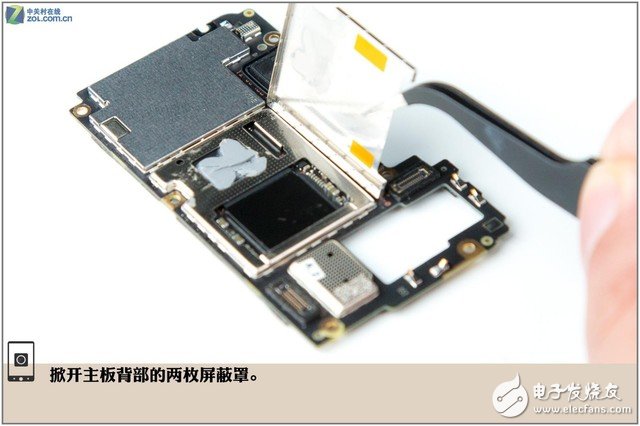
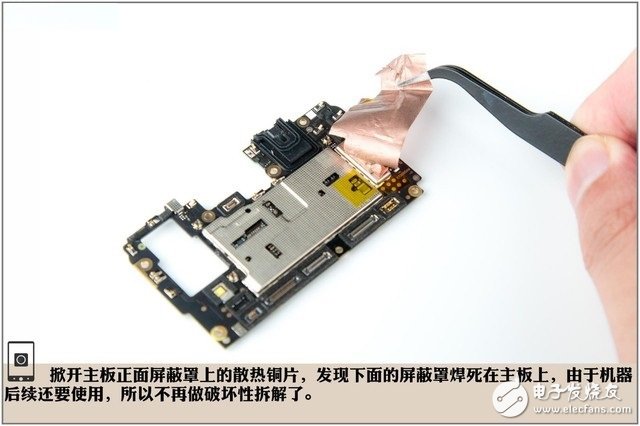
In the demolition of the motherboard money, first power off the motherboard motherboard line. Firstly, the graphite heat spreader on the shielding cover is opened, and there is also a heat dissipation copper design under the heat dissipation paste. This kind of heat dissipation combination is not common, because most models are selected one by one, and even some thousand ones are not. In this regard, the aircraft is very particular about heat dissipation.
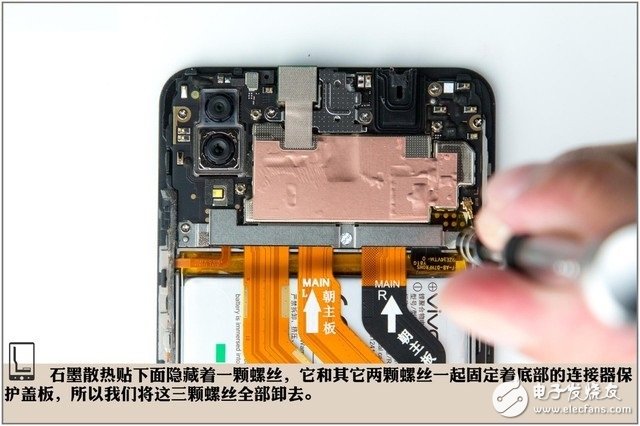
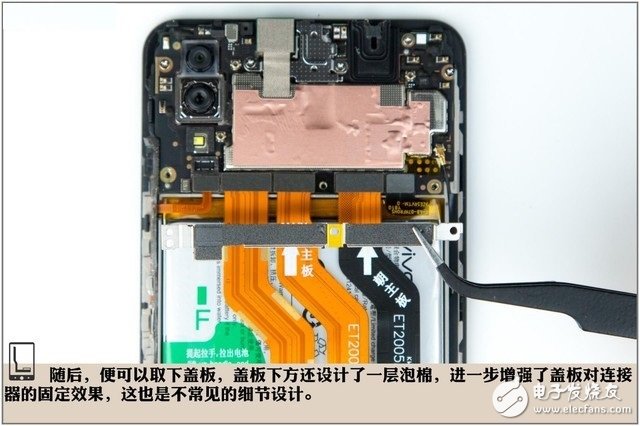
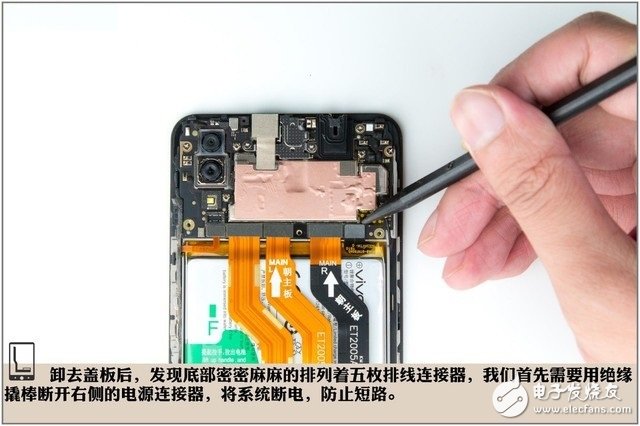
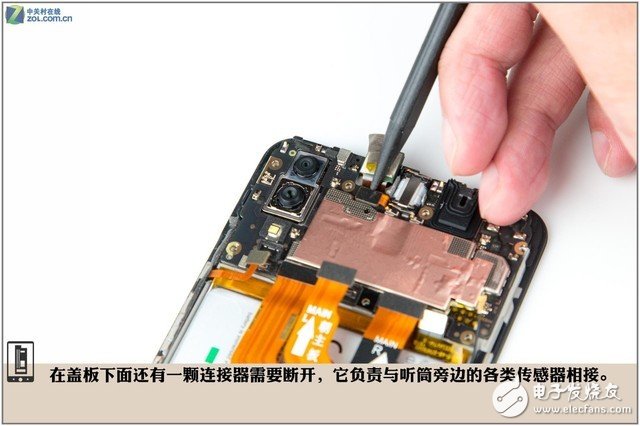
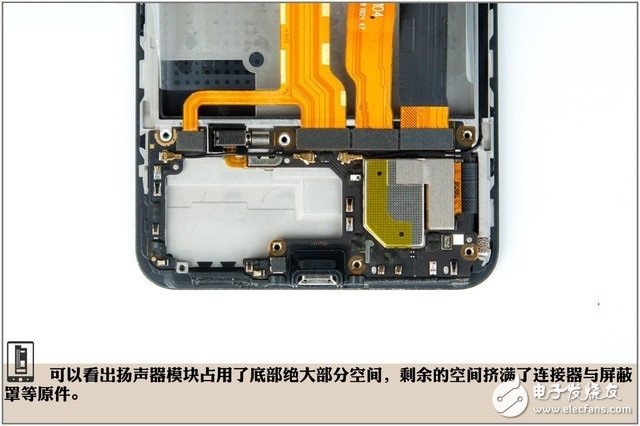
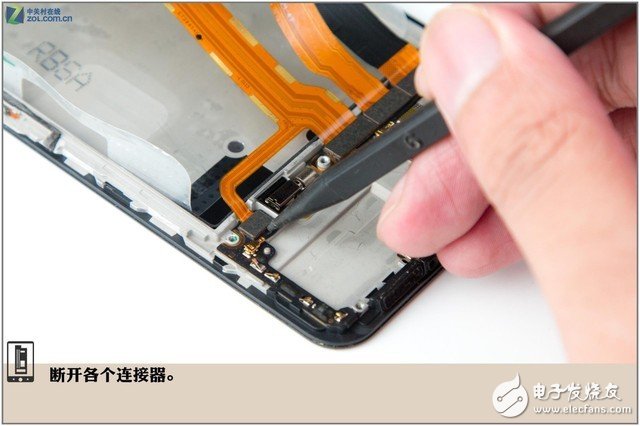
After removing the cover, it was found that there were five cable connectors arranged densely at the bottom. We first needed to use an insulating rod to disconnect the power connector on the right, and the system was powered off to prevent a short circuit.
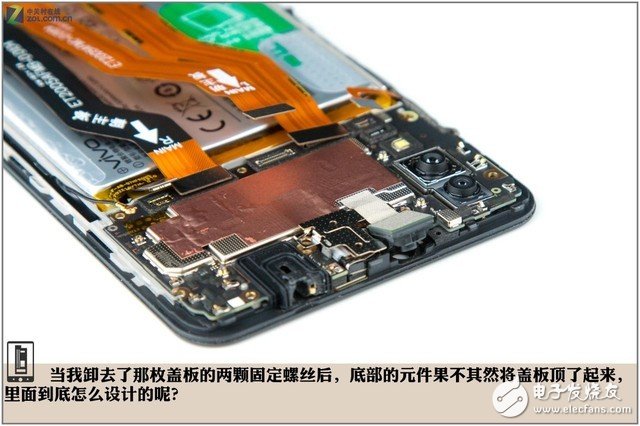
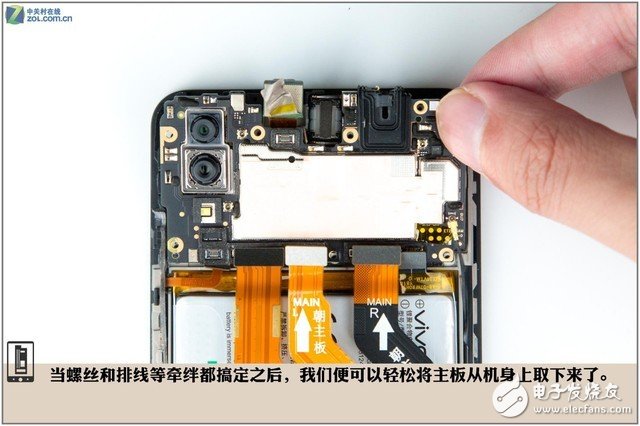
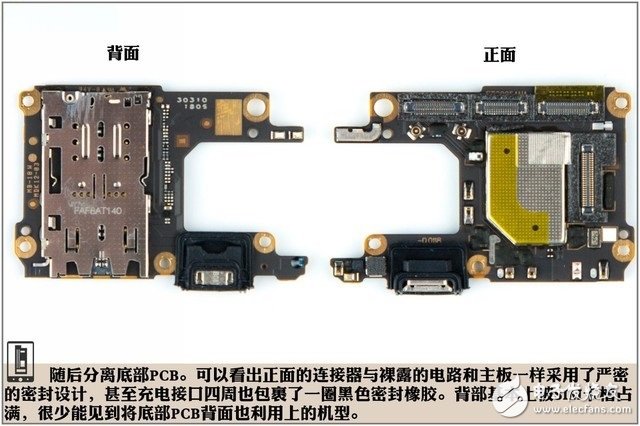
After the screws and cables are all set, we can easily remove the motherboard from the camera, as shown in the figure below.
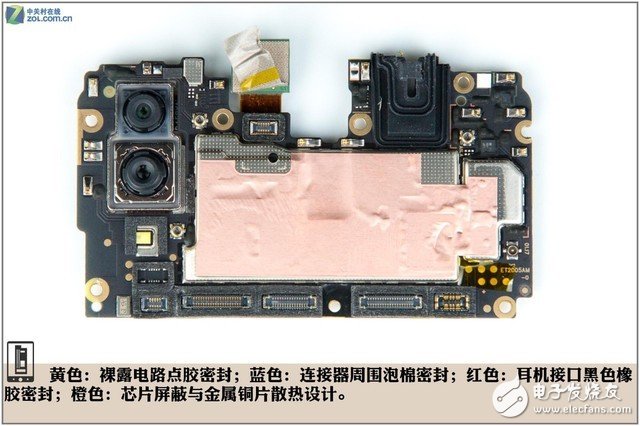
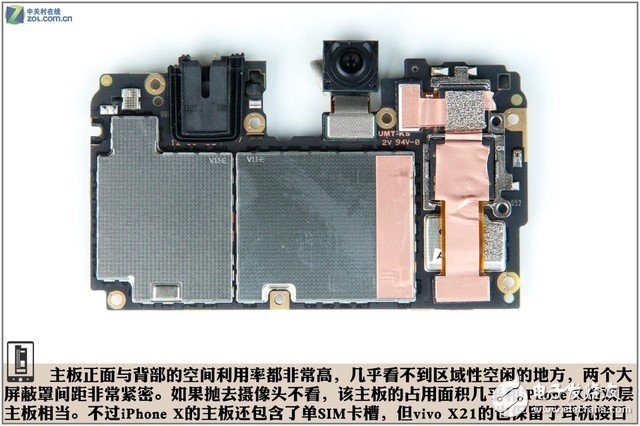
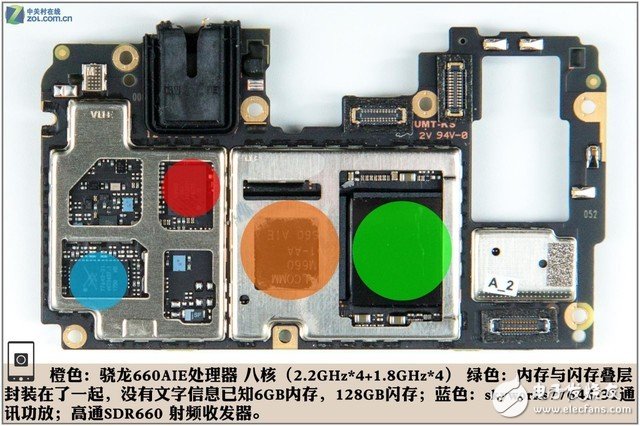
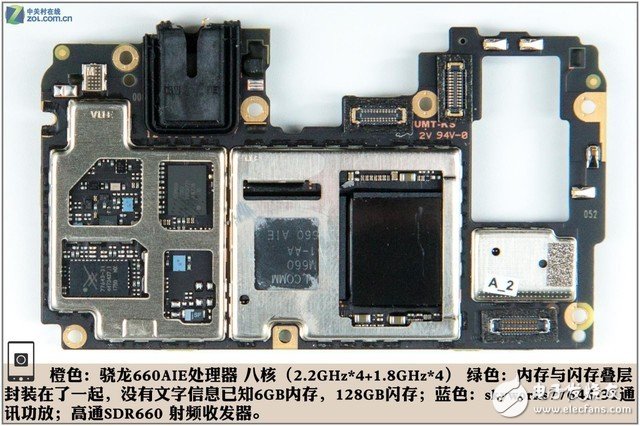
The figure below is a close-up of the upper X-ray fingerprint version of the vivo X21 screen. The specific components are detailed in the group icon below.

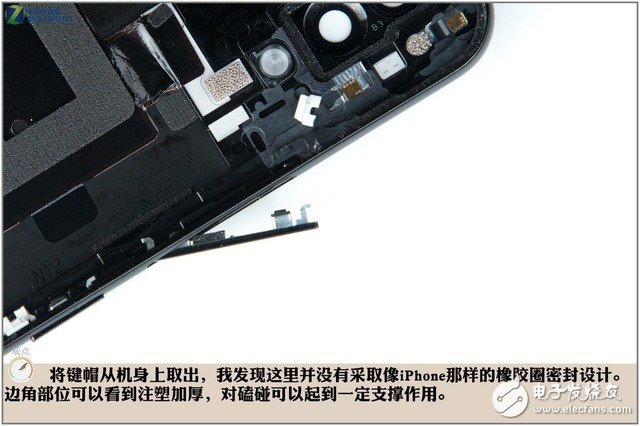
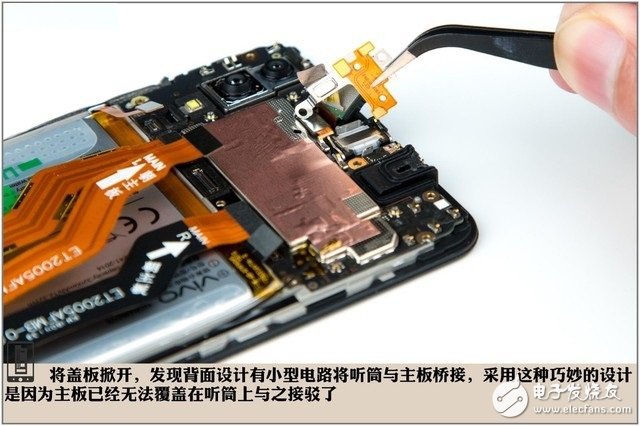
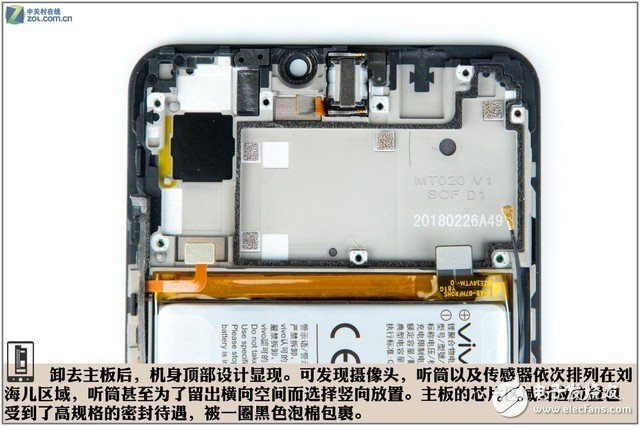
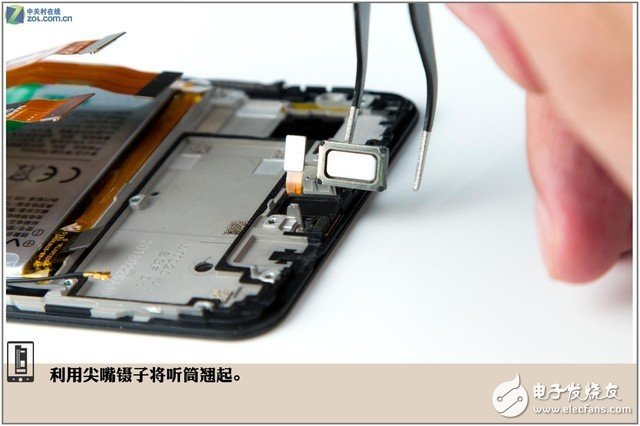
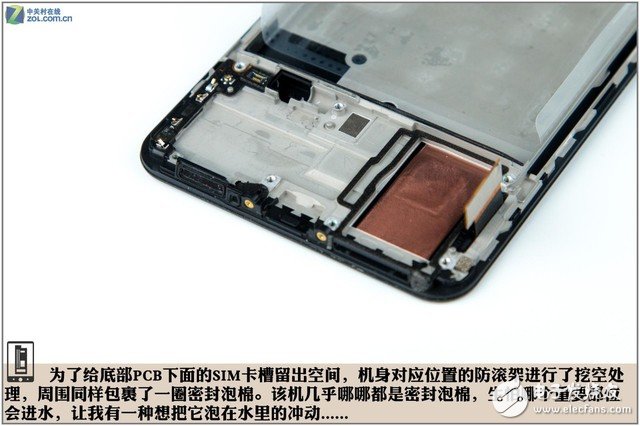
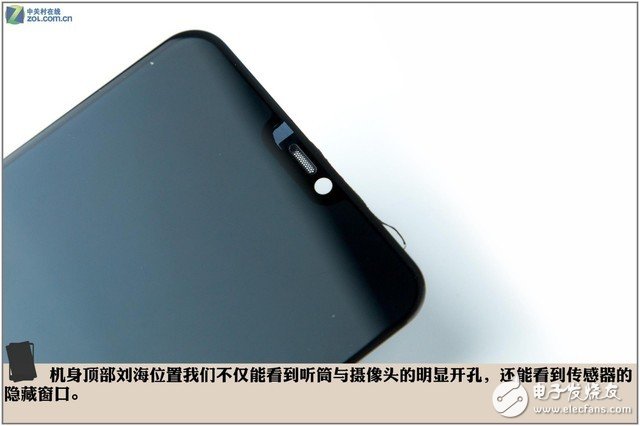
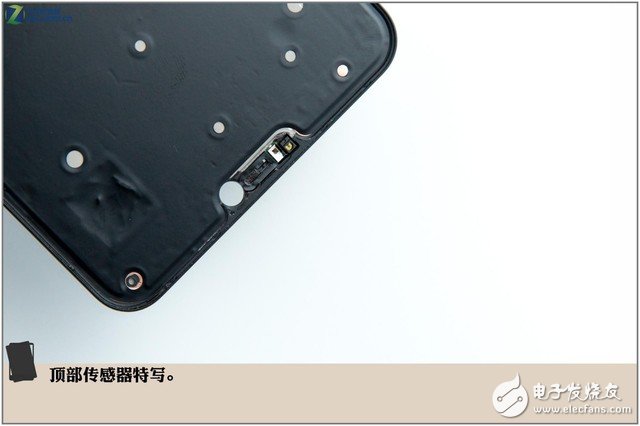
Step 5: After removing the motherboard, the top of the fuselage design appears. It can be found that the camera, the earpiece and the sensor are arranged in the area of ​​Liu Haier once. The handset is even placed vertically for the outflow of horizontal space. The location of the chip's chip area has also been treated with a noble and sealed seal, wrapped in a circle of black foam.
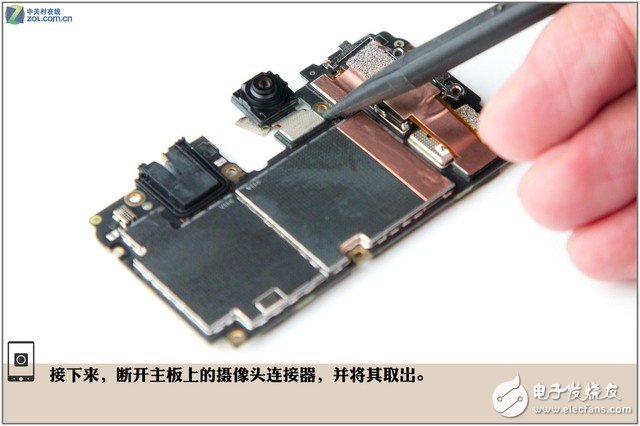
Step 6: Next disconnect the camera connector on the motherboard and remove it. The following picture shows the disassembled front single shot and rear double shot close-up.
Open the shield on the motherboard chip and look at the close-up of the core chip on the motherboard.
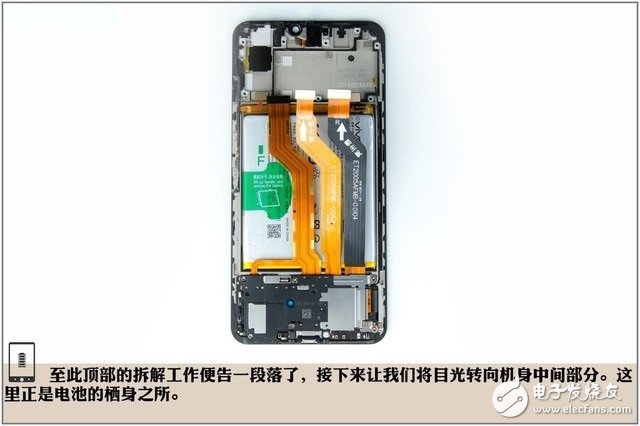
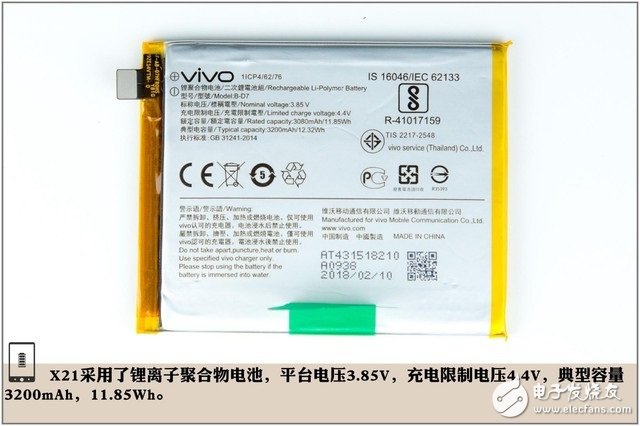
Step 7: At this point, the dismantling at the top has come to an end. Jessella lets us turn our attention to the middle part. This is the battery part, as shown in the figure below.


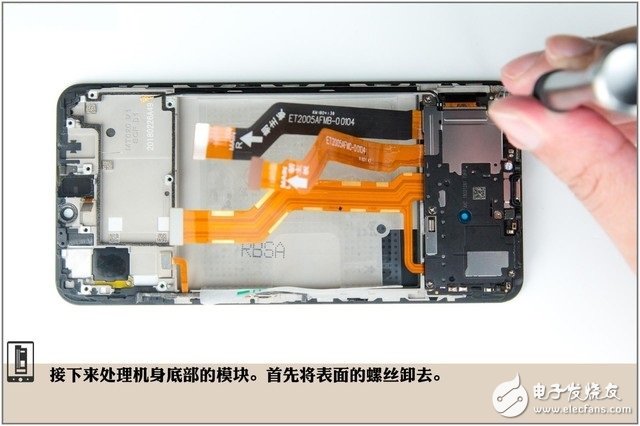
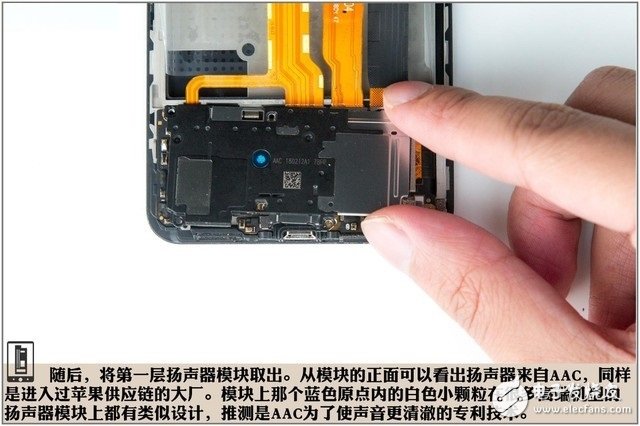
Step 8: The final step is to disassemble the small sub-board at the bottom.

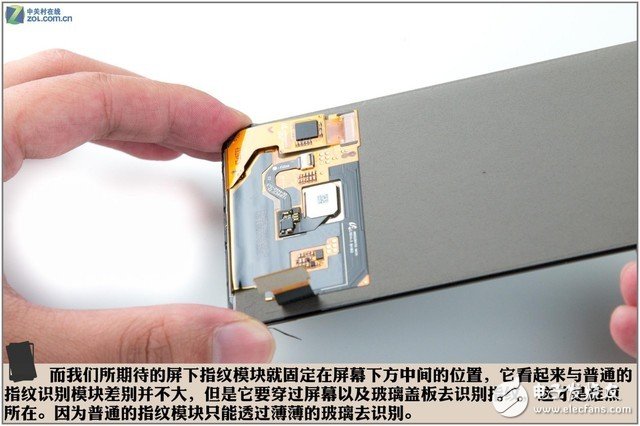
Step 9: Fingerprint Disassembly on Screen
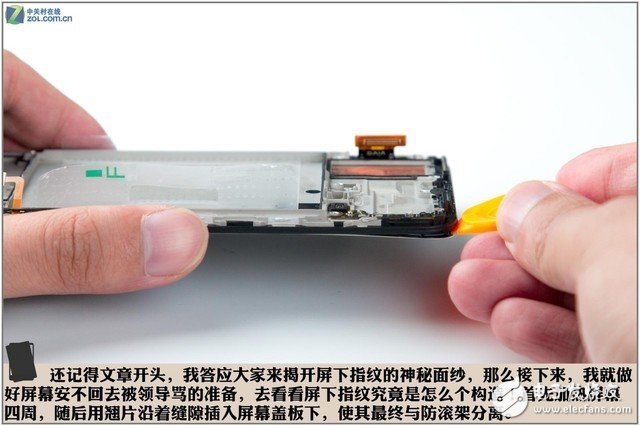
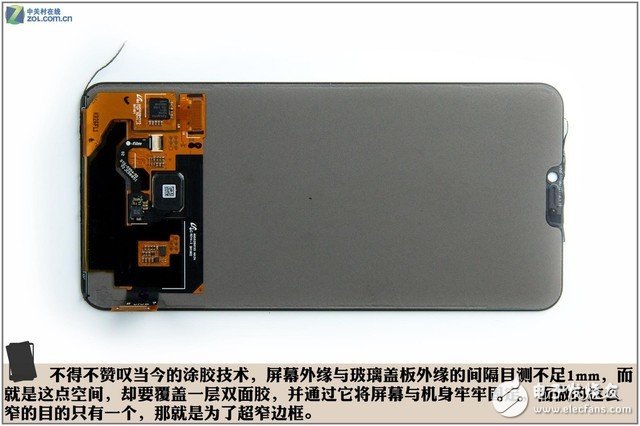
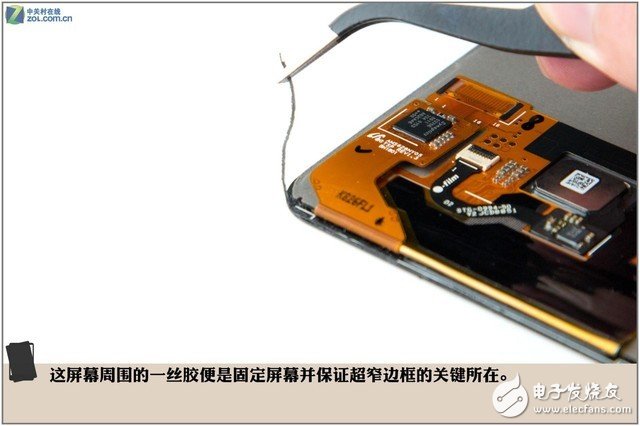
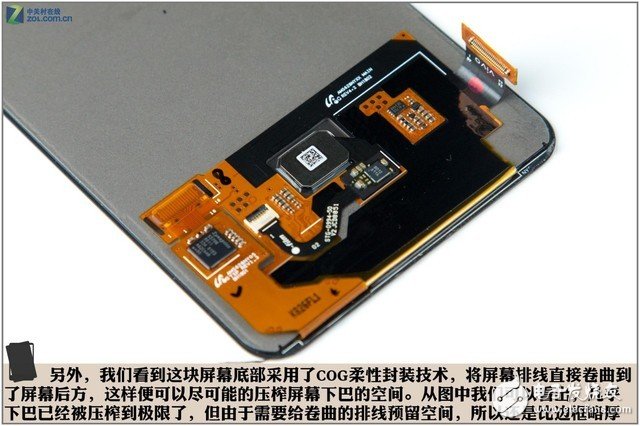
The parts of the fuselage that can be disassembled are basically removed. According to past experience, dismantling here is a bit high. However, in order to reveal how the fingerprints on the screen were made, we continued to violently dismantle the screen below this disassemble, and we directly took the picture.
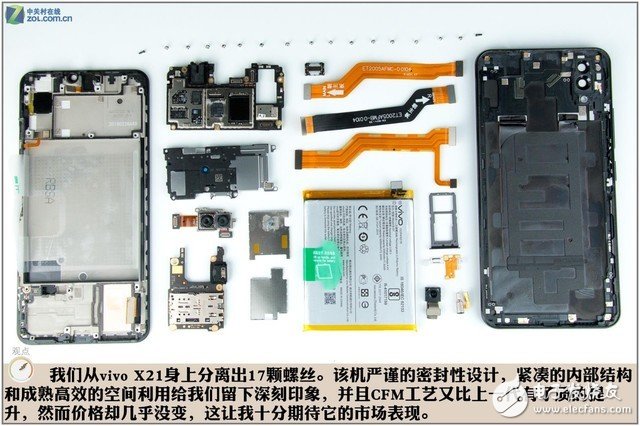
Vivo X21 screen fingerprint version disassemble here to end, and finally look at a family family portrait.
Wall switch and socket, push switch and socket, Home switch socket
Guangdong Shunde Langzhi Trading CO., Ltd , https://www.langzhielectrical.com