This tutorial is only for Tmall 1S+(TMB2200RA) Brush!
The current rom package is still not perfect, yet it can not restore the original system! Please be careful!
Lynx Box Exchange Group: 488173725
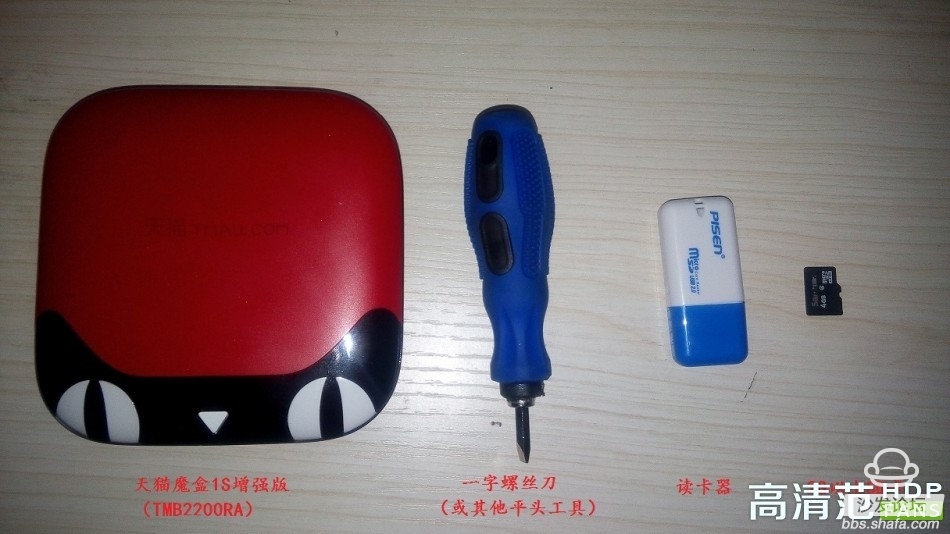
Host, flat head screwdriver, knife, card reader, SD card with 2G or more 8G.
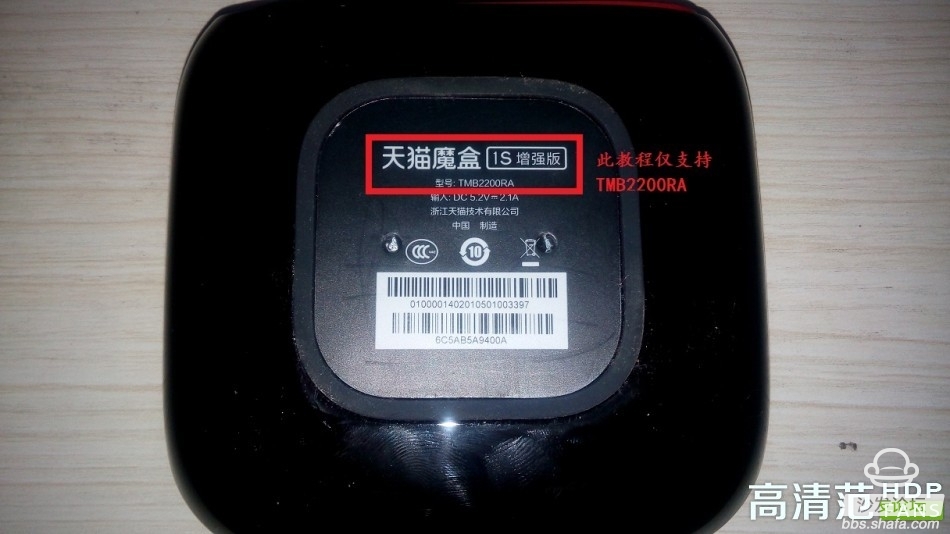
Only supports TMB2200RA
2, open the built-in hidden SD card slot:
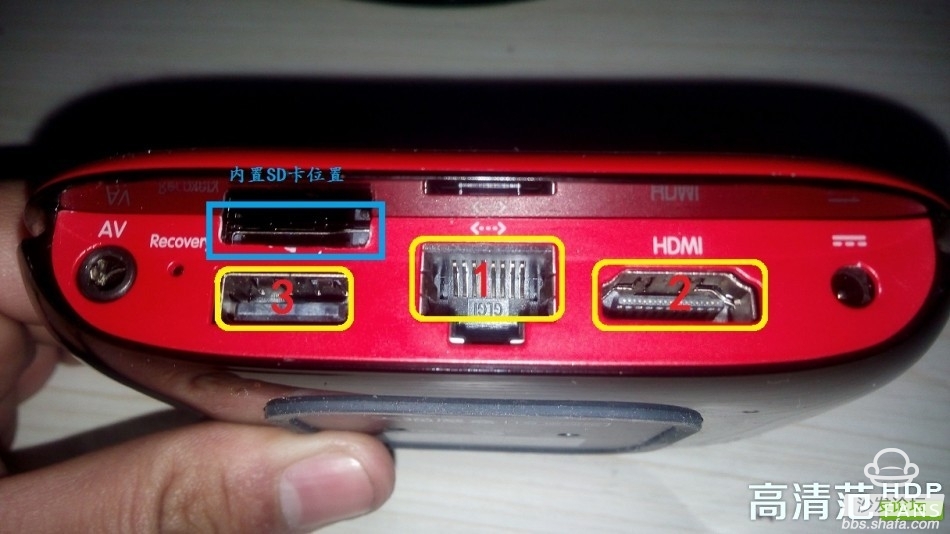
Above the USB interface is a hidden SD card slot. Use a flathead screwdriver to pick up the USB, network cable, and HDMI port.
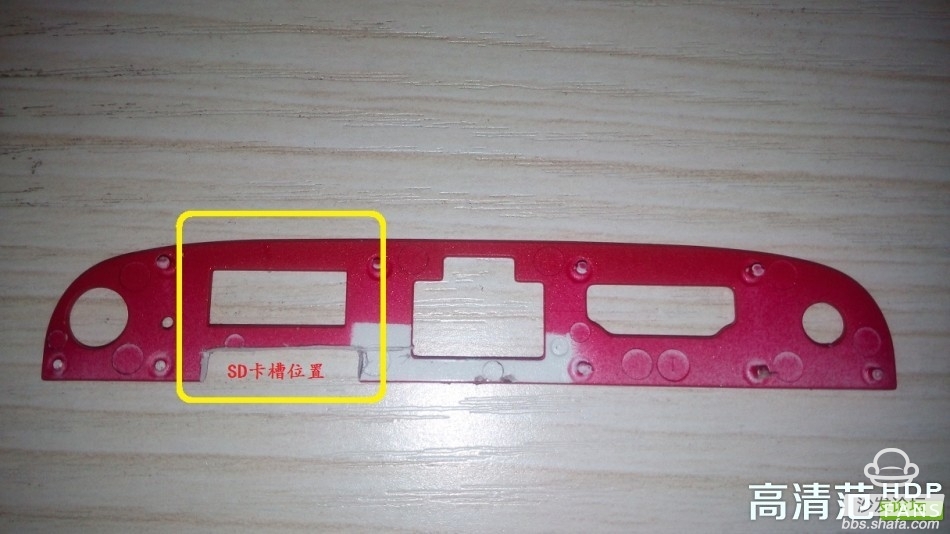
Use a knife to cut off the slot tab.
Open the PhoenixCard_V309 folder of the Brush tool with two Brush tools.
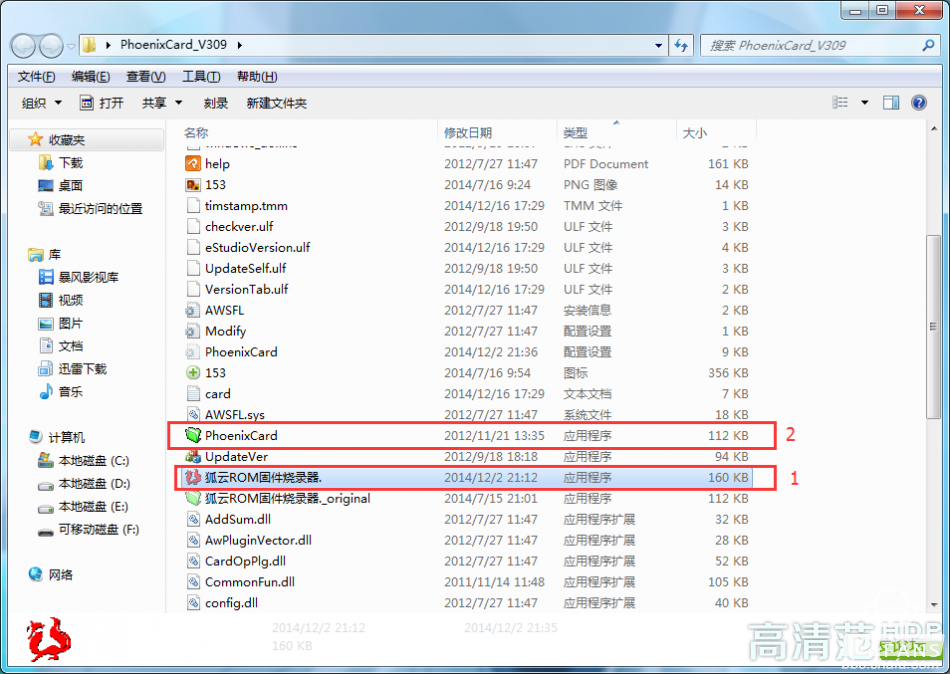
Both tools are available, the first one recommended.
(Note: Burning will damage the data in SD card, please back up useful data!)

When the progress bar reaches the end, the log shows the end of programming, and the color of the button returns to normal.
(If it fails, try the steps again and use an unused SD card for stability.)
4, start brushing machine:
Place the SD card into the slot's built-in SD card slot.
(Note: Unplug the power supply and then insert the SD card.)
Plug in the power plug, the display will show a progress bar, brushing process may last about 5 minutes.
After the progress bar goes dark, unplug the power supply, unplug the SD card (remember), re-insert the power and wait for booting, the first start will last about 5 minutes, then the speed will be normal.
2. Why is my progress bar not moving?
Answer: The programming process takes 3-5 minutes.
3, why no signal after the brush on the monitor?
Answer: After the programming is completed, it is necessary to cut off the power and then remove the SD card, and then plug it in.
4, brush machine into the desktop, the remote control does not respond?
A: The first time you enter the desktop, the system automatically configures the desktop program and will not respond for a few seconds.
5, click on the program icon to return to the desktop, the second click to enter the software?
A: The first time you enter the desktop is the initial screen. All icons are shortcuts when the Fox Cloud desktop is started for the first time. The first time you enter is to select the program you want to use.
The current rom package is still not perfect, yet it can not restore the original system! Please be careful!
Lynx Box Exchange Group: 488173725
Brush package address:
Http://bbs.shafa.com/thread-1273483-1-1.html
1, preparation tools:
Host, flat head screwdriver, knife, card reader, SD card with 2G or more 8G.
Only supports TMB2200RA
2, open the built-in hidden SD card slot:
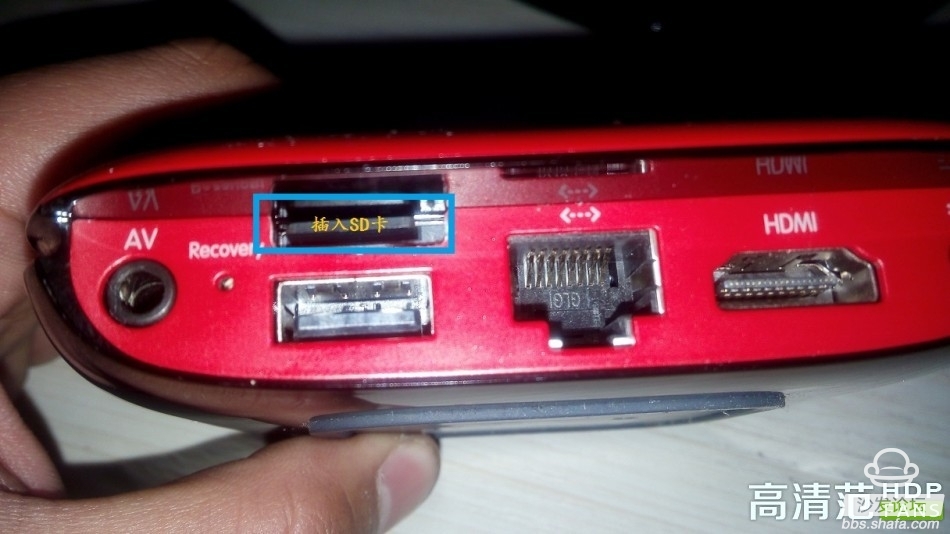
Above the USB interface is a hidden SD card slot. Use a flathead screwdriver to pick up the USB, network cable, and HDMI port.
Use a knife to cut off the slot tab.
3, making Fox Cloud ROM boot card:
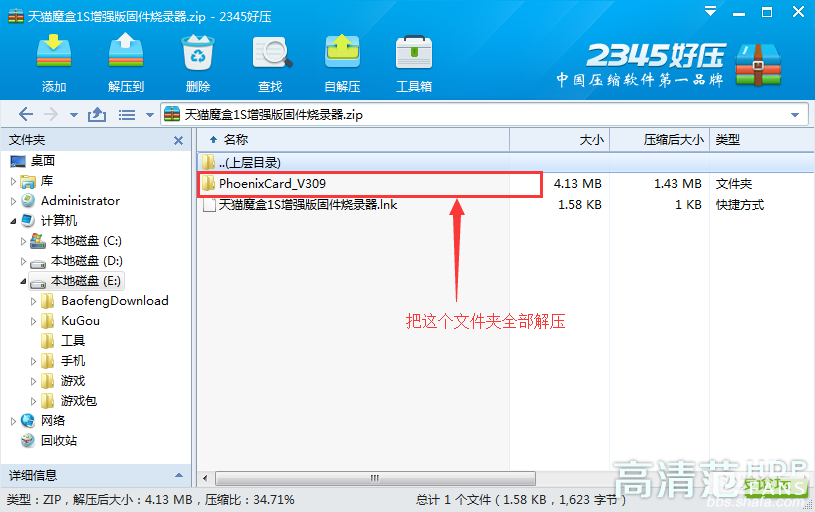
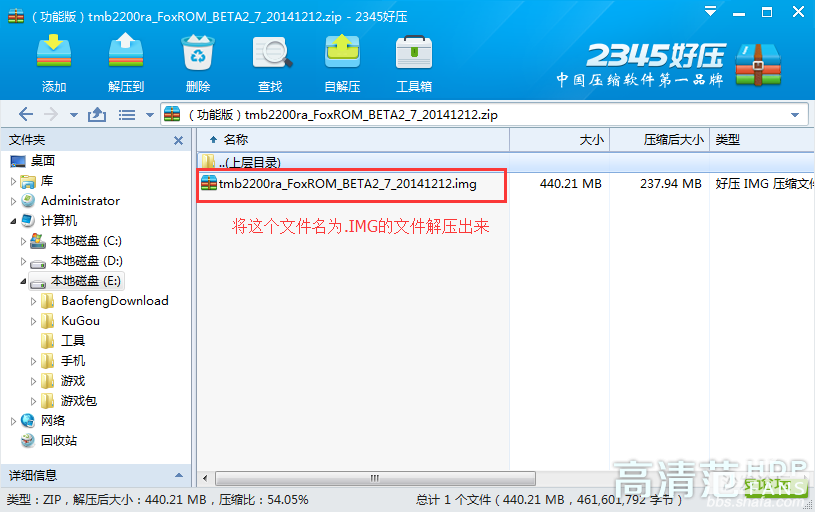
Extract the downloaded tools and flash package: PhoenixCard_V309 folder, tmb2200ra_FoxROM_BETA2_7_20141212.IMG extract to the desktop.
(Note: Brush Pack is in .IMG format. This file cannot be extracted.)
Extract the downloaded tools and flash package: PhoenixCard_V309 folder, tmb2200ra_FoxROM_BETA2_7_20141212.IMG extract to the desktop.
(Note: Brush Pack is in .IMG format. This file cannot be extracted.)
Fox cloud ROM burning tool, Brush package above address: http://pan.baidu.com/s/1eRwkr5K
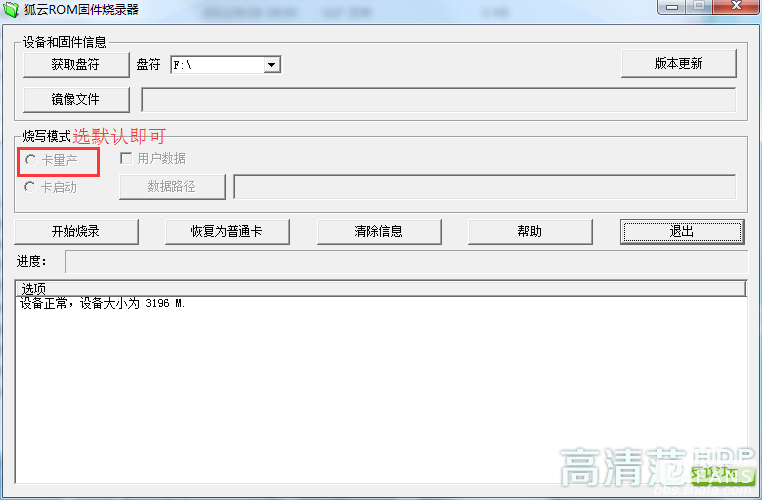
Open the PhoenixCard_V309 folder of the Brush tool with two Brush tools.
Both tools are available, the first one recommended.
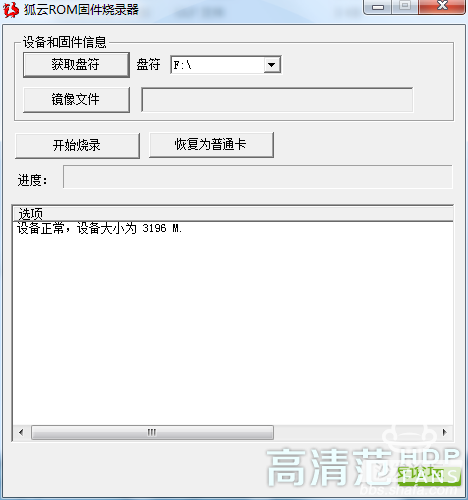
(Note: Burning will damage the data in SD card, please back up useful data!)
Select the desired SD card from the drive letter, click the image file, select the extracted tmb2200ra_FoxROM_BETA2_7_20141212.IMG, and start burning.
Burning may last for about 3 minutes. All buttons are grayed out during operation and cannot be clicked.
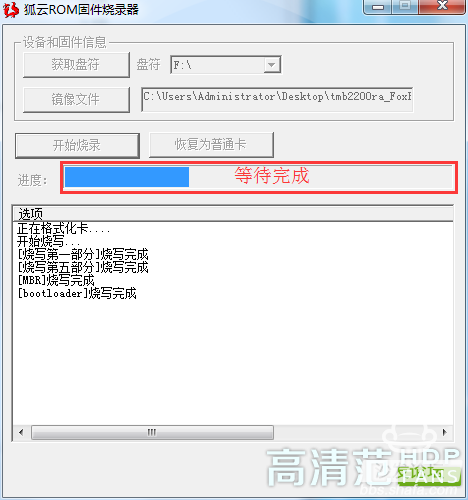
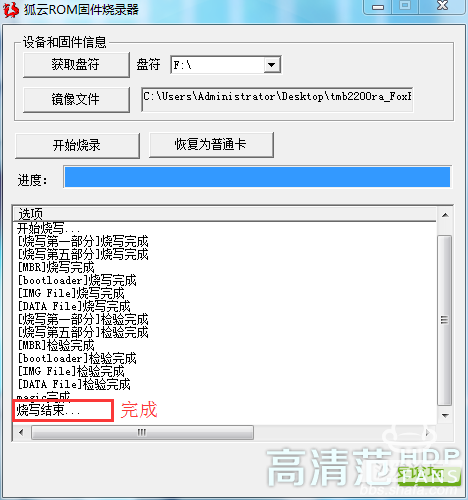
When the progress bar reaches the end, the log shows the end of programming, and the color of the button returns to normal.
(If it fails, try the steps again and use an unused SD card for stability.)
4, start brushing machine:
Place the SD card into the slot's built-in SD card slot.
(Note: Unplug the power supply and then insert the SD card.)
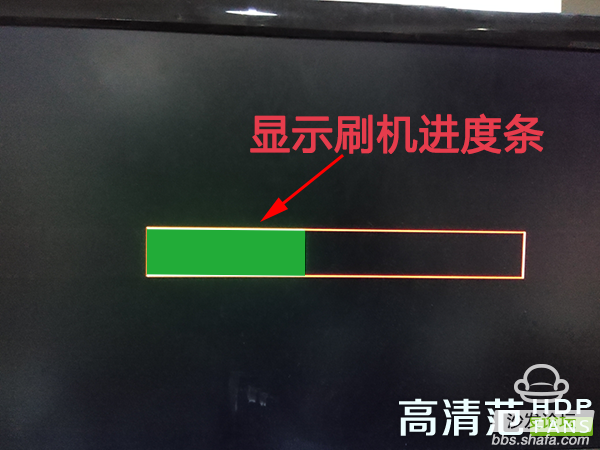
Plug in the power plug, the display will show a progress bar, brushing process may last about 5 minutes.
------------------------>Special attention
After the progress bar goes dark, unplug the power supply, unplug the SD card (remember), re-insert the power and wait for booting, the first start will last about 5 minutes, then the speed will be normal.
This tutorial is over! Here are a few general knowledge points:
1. Why can't I see data in "My Computer" after my card is burned?
Answer: Burning is to divide the SD card into a part of space as a hidden partition. The data packet is written to it. WINDOWS does not support this partition format by default, so it will not be displayed.
Answer: Burning is to divide the SD card into a part of space as a hidden partition. The data packet is written to it. WINDOWS does not support this partition format by default, so it will not be displayed.
2. Why is my progress bar not moving?
Answer: The programming process takes 3-5 minutes.
3, why no signal after the brush on the monitor?
Answer: After the programming is completed, it is necessary to cut off the power and then remove the SD card, and then plug it in.
4, brush machine into the desktop, the remote control does not respond?
A: The first time you enter the desktop, the system automatically configures the desktop program and will not respond for a few seconds.
5, click on the program icon to return to the desktop, the second click to enter the software?
A: The first time you enter the desktop is the initial screen. All icons are shortcuts when the Fox Cloud desktop is started for the first time. The first time you enter is to select the program you want to use.
Dash Cam Front And Inside,Dash Dual Cam,Dashcam For Cars,Sharper Image Dash Cam
SHENZHEN ROSOTO TECHNOLOGY CO., LTD. , https://www.rdtkdashcam.com